Building a 5e3 Tweed amp has been on my to do list for years. Thought about attending the Tramp building workshop Stephen hosted a couple of years ago but I couldn't make it happen. Recently I saw Trinity Amps featured on Kim Mitchell's "Guitar Picks" show on AUXTV; that pushed me over the edge and I placed an order. Living in the GTA made picking up my Trinity Tweed kit, Tweed cabinet and VRM kit from Stephen in Brighton, ON a relatively short drive. While I was waiting for my tweed cabinet to be built I read every Trinity Tweed related post on this forum.
I'm not an experienced amp builder. However I did assemble a David Hafler DH-101 preamp kit back in highschool; and maintained some soldering skills building Cigar Box guitars; and I know the difference between a resistor and a capacitor due to the Heathkit Junior Electronics Lab I got for Christmas when I was 11 years old. I took my time building this amp, methodically following the Trinity Builder's Guide, which was great. After completing the power up procedure in the builder's guide my amp fired up perfectly the first time. I'm totally thrilled with the end result. The amp sounds great and I have to put my head close to the speaker to hear any sort of hiss or hum.
I though I'd share my build pic's for future builders as I found the pic's posted by others on the forum so helpful (Thanks MitchM, ajmckay and Olivia)
Thanks Stephen for a great Tweed kit.
| Attachments: |
File comment: Setup my workbench for amp building. Bought a new soldering iron, the old one needed to be retired.

1.JPG [ 129.59 KiB | Viewed 11111 times ]
|
File comment: Did my BOM check. Was short a couple of pots which Stephen promptly shipped out to me.

2.JPG [ 103.82 KiB | Viewed 11111 times ]
|
File comment: Measured and confirmed component values. One resistor was a bit off which Stephen replaced.

6.JPG [ 109.13 KiB | Viewed 11111 times ]
|
File comment: Intalled chassis hardware and wired the heaters under the chassis lip as neatly as possible.

7.JPG [ 139.42 KiB | Viewed 11111 times ]
|
File comment: More heater wiring.

9.JPG [ 132.68 KiB | Viewed 11111 times ]
|
File comment: Installed the power transformer and wired the VRM.

10.JPG [ 145.01 KiB | Viewed 11111 times ]
|
File comment: Checked that the power transformer was working properly using the dim bulb tester I built.

12.JPG [ 143.92 KiB | Viewed 11111 times ]
|
File comment: Wired the output transformer.

13.JPG [ 124.85 KiB | Viewed 11111 times ]
|
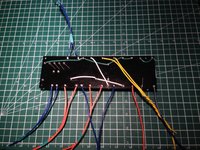
File comment: Wired the back of the eyelet board.

14.JPG [ 163.95 KiB | Viewed 11111 times ]
|
File comment: Install board components. Can you see my mistake where I installed a 1 meg film resistor instead of a 1 meg carbon resistor?

15.JPG [ 163.11 KiB | Viewed 11111 times ]
|
File comment: Wired the input jacks outside the chassis.

16.JPG [ 108.41 KiB | Viewed 11111 times ]
|
File comment: Completed amp installed into cabinet.

19.JPG [ 140.18 KiB | Viewed 11111 times ]
|
File comment: An amp guts shot.

20.JPG [ 155.12 KiB | Viewed 11111 times ]
|
File comment: Some more amp guts.

22.JPG [ 121.22 KiB | Viewed 11111 times ]
|
File comment: With a BBQ 12A125A speaker installed.

24.JPG [ 149.87 KiB | Viewed 11111 times ]
|
File comment: My Trinity Tweed in it's new home.

photo 2.JPG [ 120.27 KiB | Viewed 11111 times ]
|


